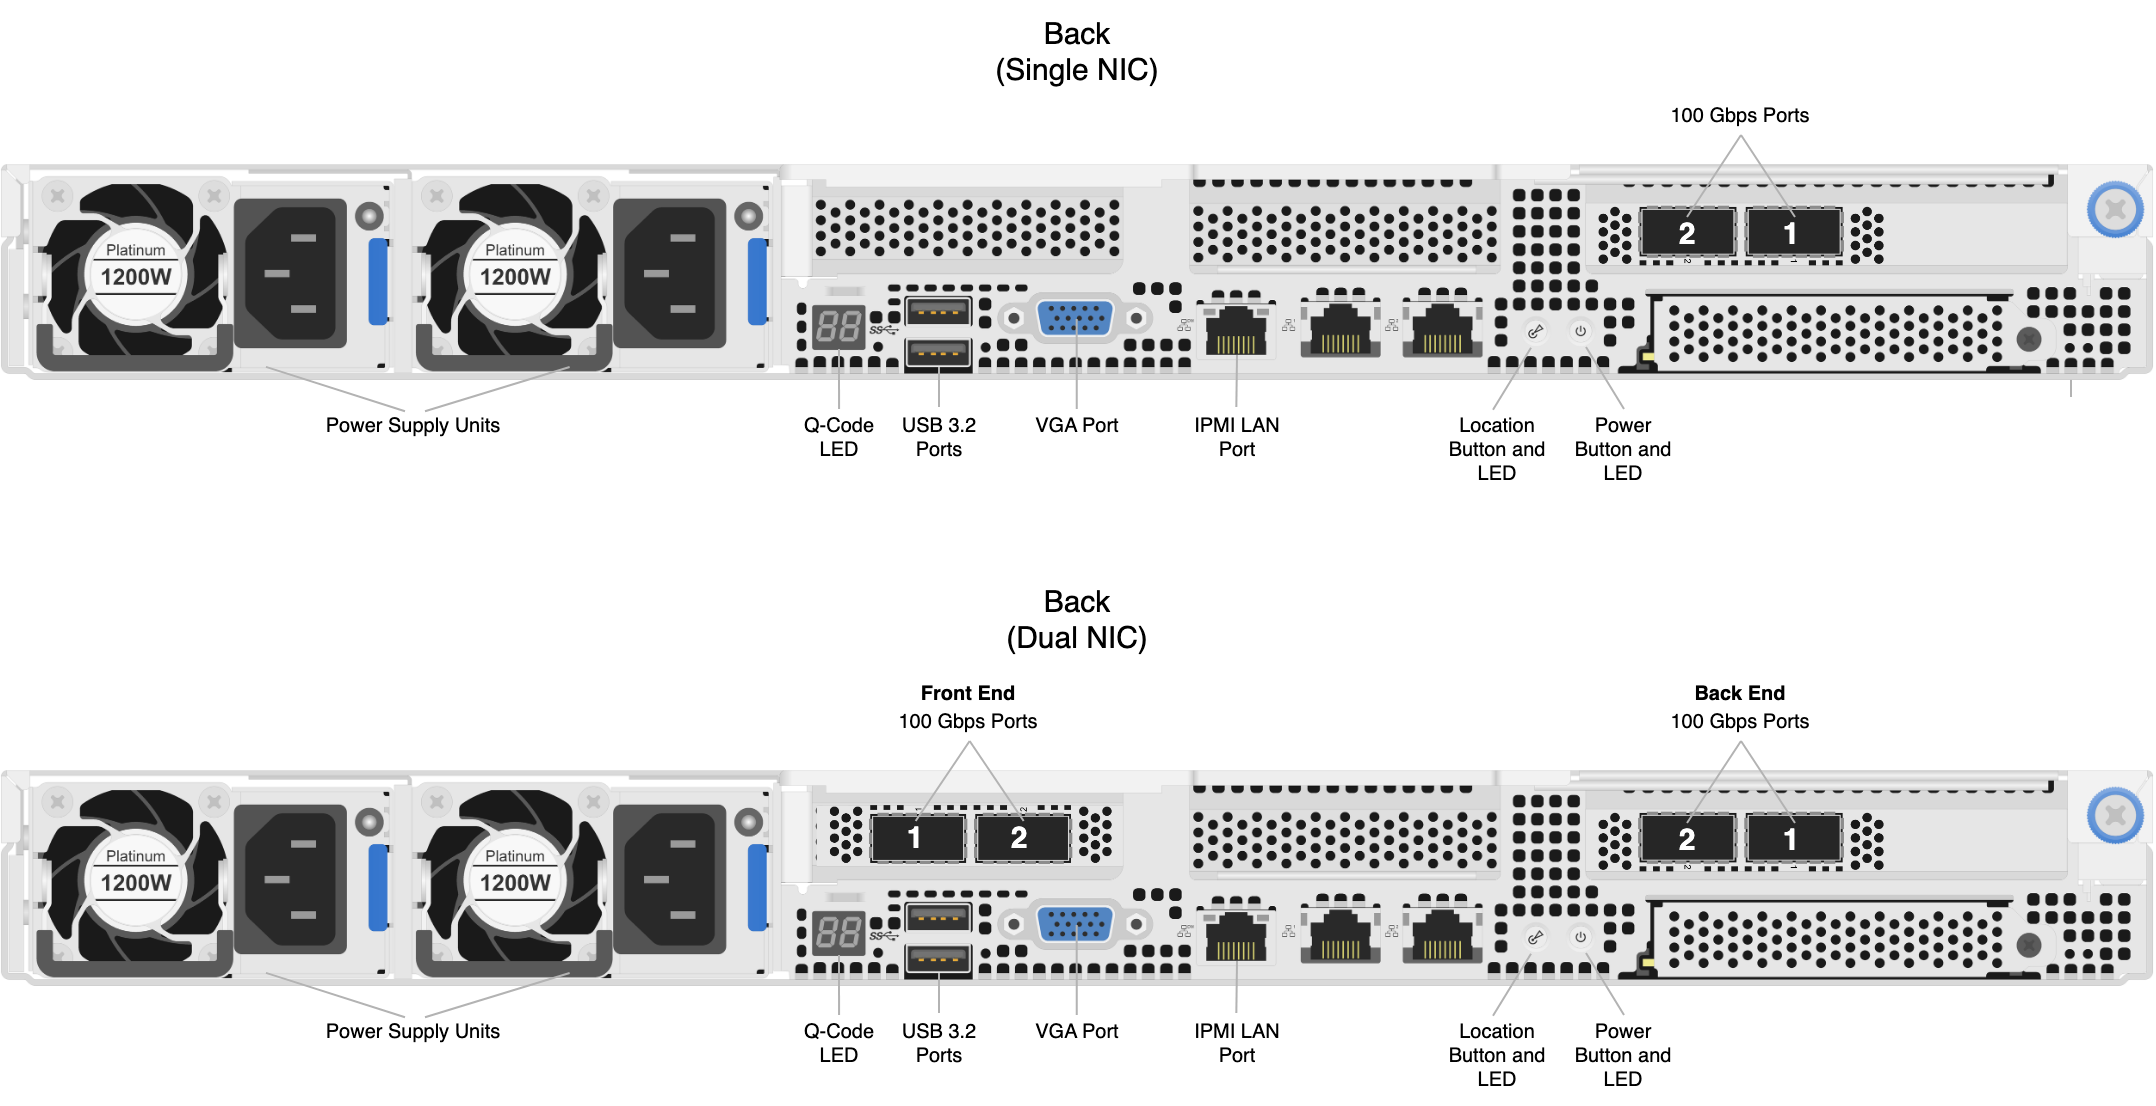
This section explains how to wire the out-of-band management (IPMI) port, 100 Gbps ports, and power on Quiver 1UA Gen1 nodes.
Depending on its technical specifications, your node uses unified or split networking configuration. For more information, see Connecting the 100 Gbps Ports.
- For dual-NIC nodes, the left NIC is for the front end and the right NIC is for the back end.
- The two rightmost Ethernet ports on the back of your node are unused.

Step 1: Connecting the Out-of-Band Management (IPMI) Port
The dedicated out-of-band management port allows functionality such as remote display, control, and power. The port uses the Intelligent Platform Management Interface (IPMI) protocol.
The IPMI port is located on the back of your node.
For more information, see Default IPMI Usernames and Passwords 🔒 on Qumulo Care.
The IPMI username and password are unrelated to your Qumulo administrative credentials.
To configure the IPMI port, you must use the Server Management Interface. For more information, see ASMB11-iKVM Server Management Board User Guide in the ASUS documentation.
Step 2: Connecting the 100 Gbps Ports
After you connect the IPMI port, connect your 100 Gbps ports (compatible with QSFP28 or QSFP56).
-
Single NIC: This platform uses a unified networking configuration in which the same NIC handles back-end and front-end traffic. In this configuration, each networking port provides communication with clients and between nodes. You can connect the NIC’s ports to the same switch or to different switches.
-
Dual NIC: This platform uses a split networking configuration in which different NICs handle back-end and front-end traffic. You can connect the front-end and back-end NICs to the same switch or to different switches.
To identify the
eth port, run the following command:for i in /sys/class/net/eth*; \
do echo $i; \
cat $i/device/uevent | \
grep -i pci_slot; \
doneStep 3: Connecting the Power
After you connect your 100 Gbps ports, connect power to the node. There are two power sockets on the back of your node. To maximize redundancy, connect each PSU to a separate power supply or power distribution unit (PDU).
